IoT Series (III): Firmware testing in QEMU
This is the third blog post in our IoT series. In the last post (IoT Series (II): How to build kernel image from scratch) we left with a working firmware environment running in QEMU for the MIPS32 router using default open-source software. Now we want to test a similar device but this time for real. This time we will use an official router firmware image to extract the parts to boot the system.
To debug firmware from D-Link DIR-825 we built a default buildroot environment for MIPS32 as also demonstrated in the last blog post but we use the DIR-825 root filesystem from the firmware image. The only main difference made now was adding the gdbserver for the target and dependent features for being built.
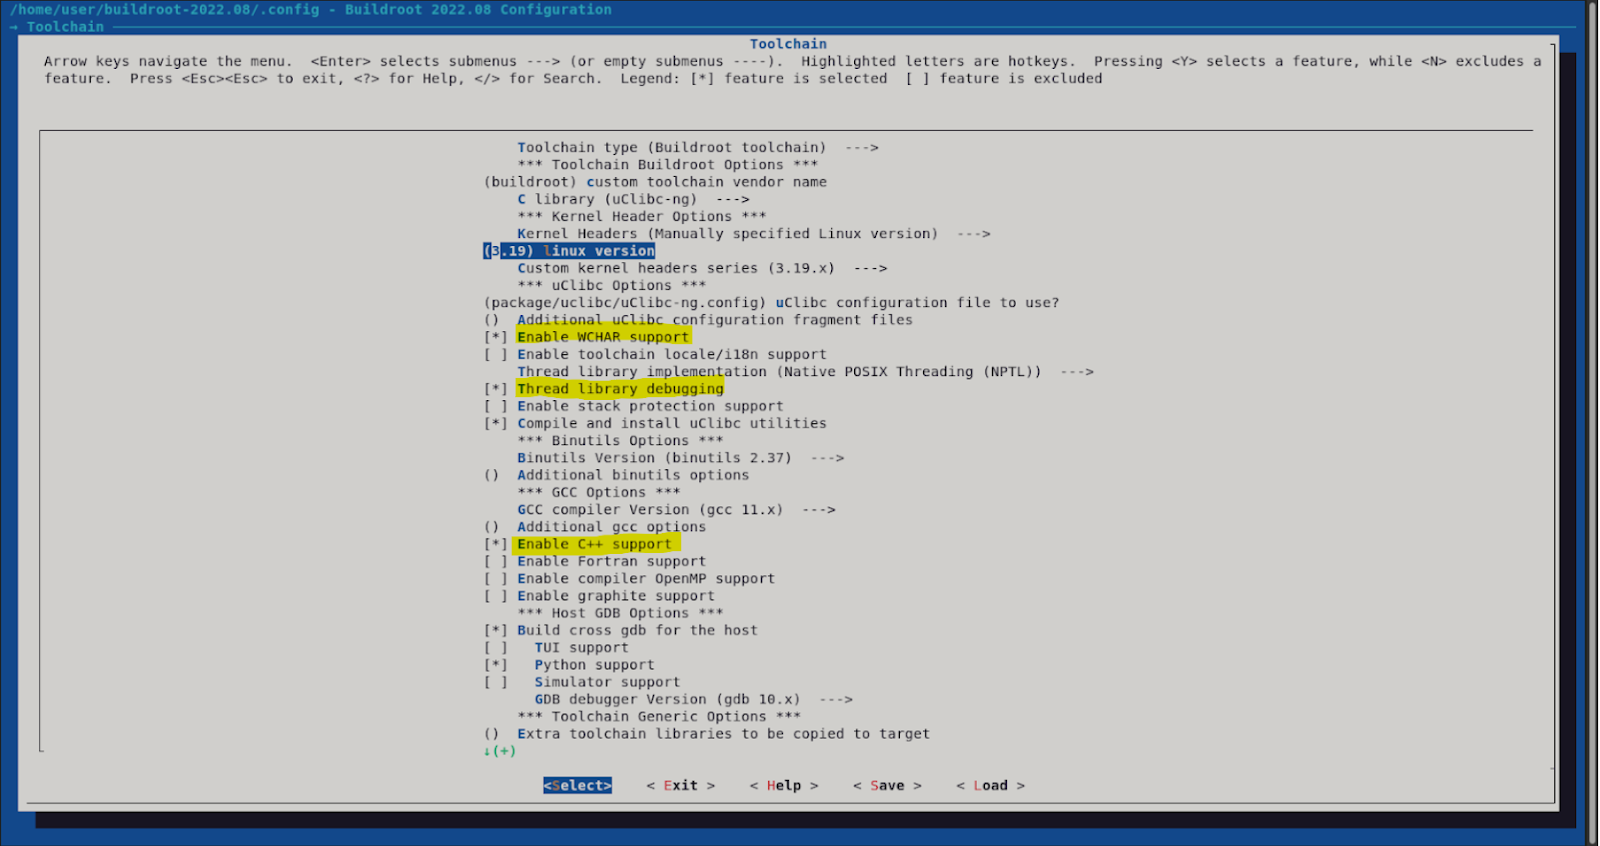
Initial buildroot configuration
On the “Toolchain” menu we must enable the following items:
- Enable WCHAR support
- Thread library debugging
- Enable C++ support
This will enable now to select gdbserver from the “Target packages > Debugging, profiling and benchmark” menu.
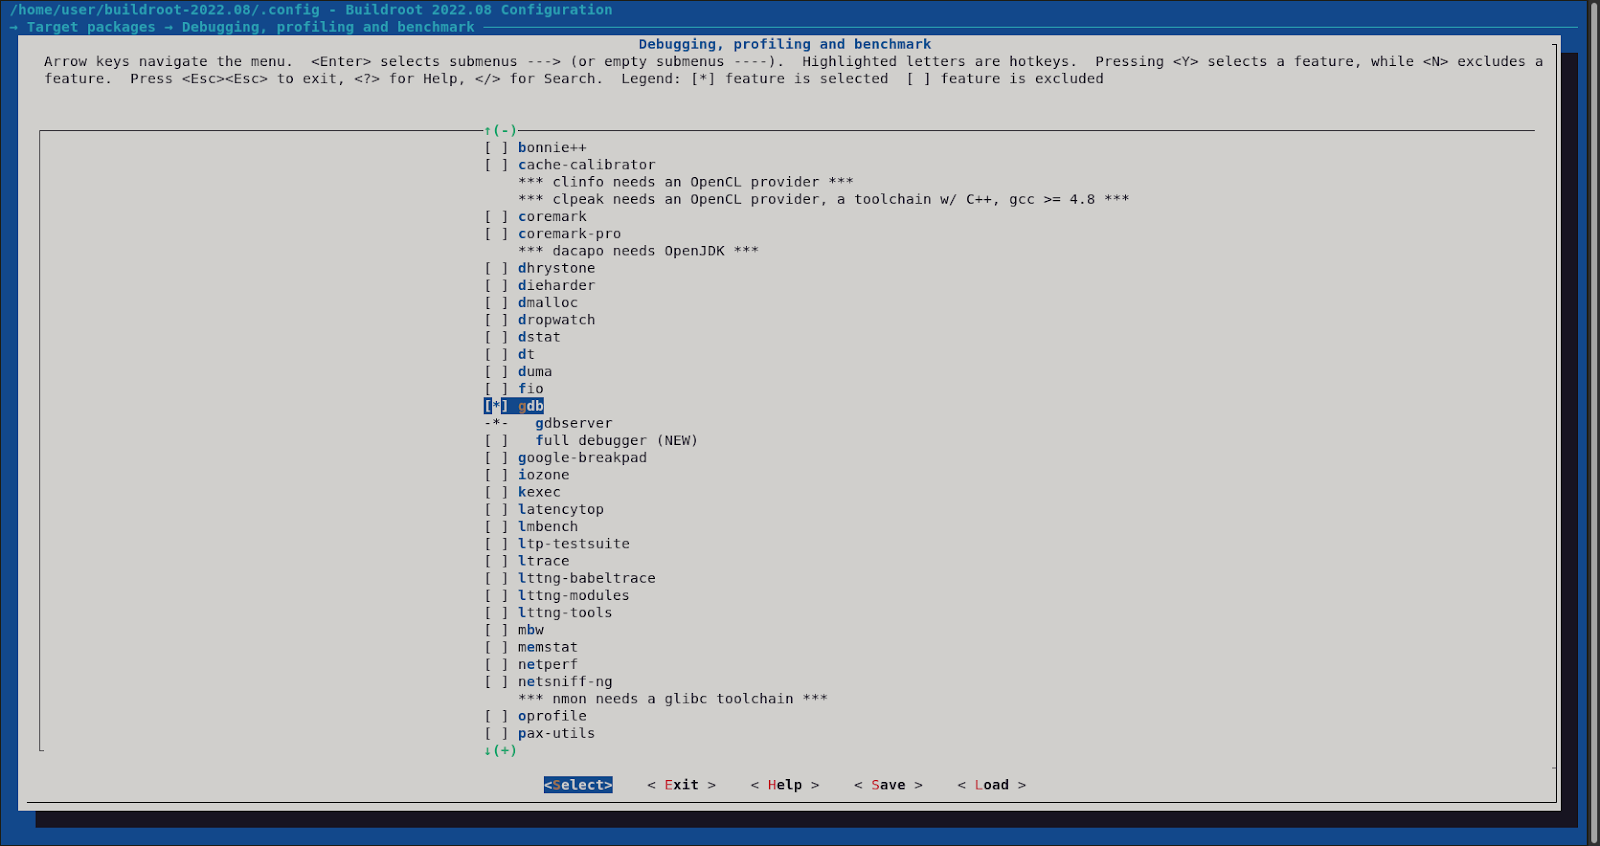
We must also change “Build options > libraries” to “static only” to build gdbserver without dependencies.
Now we can issue the make default target.
$ make
After successfully completing the build, the target gdbserver should be at output/target/usr/bin/gdbserver.
Kernel configuration
We should ensure the kernel configuration has the following modifications.
$ make linux-menuconfig
In “Networking support > Networking options” enable “The IPv6 protocol” as built-in. This is needed by the firmware web server to bind.
In “File systems > Miscellaneous filesystems” enable “SquashFS 4.0 – Squashed file system support” as built-in, and enable “Include support for XZ compressed file systems“. This is needed to boot from a squashfs volume.
In “Device Drivers > Memory Technology Device (MTD) support” enable “Command line partition table parsing” as built-in. This is needed to customize the MTD virtual partitions in the emulation.
Now the rebuild process of the kernel can be done.
$ make
Running in qemu
In this example, we will set the primary disk as D-Link firmware, and as the secondary disk, the root filesystem from buildroot just to run gdbserver. The port 8080/tcp from the host is forwarded to port 80/tcp in the virtual machine. In the kernel cmdline the only awkward configuration is mtdparts that define the partition layout of the physmap-flash.0 mtd device and label it as config (needed by the firmware to work).
$ qemu-system-mipsel -kernel output/images/vmlinuz -drive file=../dlink-dir825/_2022.07.27-20.22_DIR_825R_RT8197G_4.0.4_release.bin.extracted/280000.squashfs,format=raw -drive file=output/images/rootfs.ext2,format=raw -append "root=/dev/sda rootfs=squashfs mtdparts=physmap-flash.0:-(config)" -net nic,model=pcnet -net user,hostfwd=tcp::8080-:80 -nographic
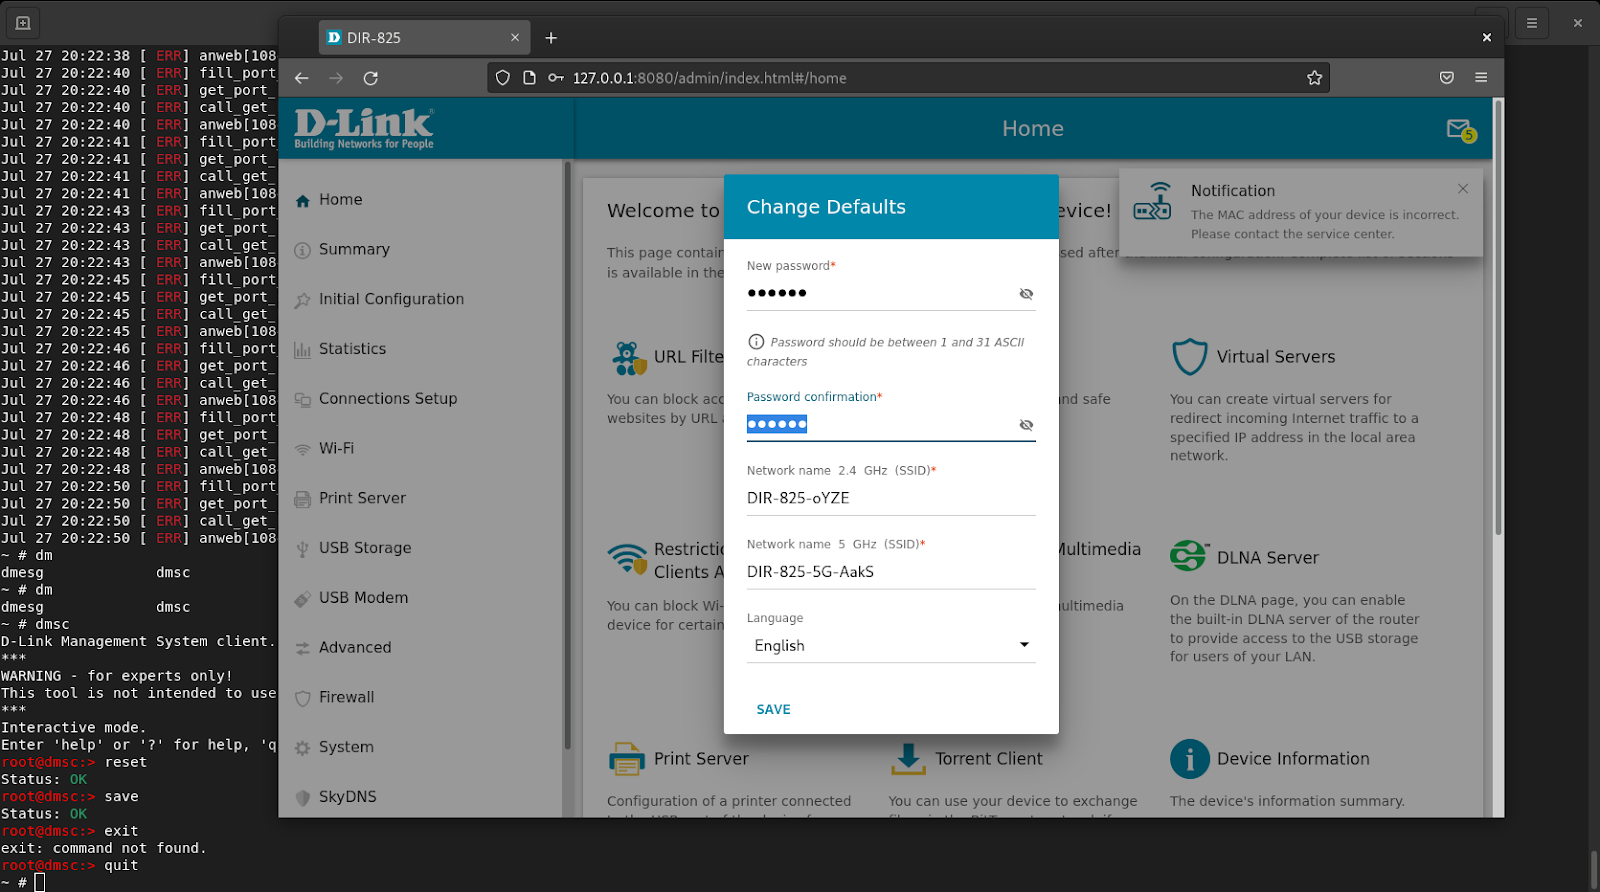
In qemu virtual machine we set the IP address of the eth0 interface issuing the following command in the console:
~ # ip addr add 10.0.2.15/24 dev eth0
And also reset the configuration (that is on the mtd partition) with dmsc utility.
~ # dmsc
root@dmsc:> reset
Status: OK
root@dmsc:> save
Status: OK
root@dmsc:> quit
Now we can access the web interface at 127.0.0.1:8080.
Creating an ext2 image with gdbserver
We can create an ext2 volume disk to use easily in any QEMU virtual machine. The following process can be done to achieve this.
$ truncate --size=8M ../dlink-dir825/gdbserver.ext2
Now as root we create an ext2 volume and copy the gdbserver into it.
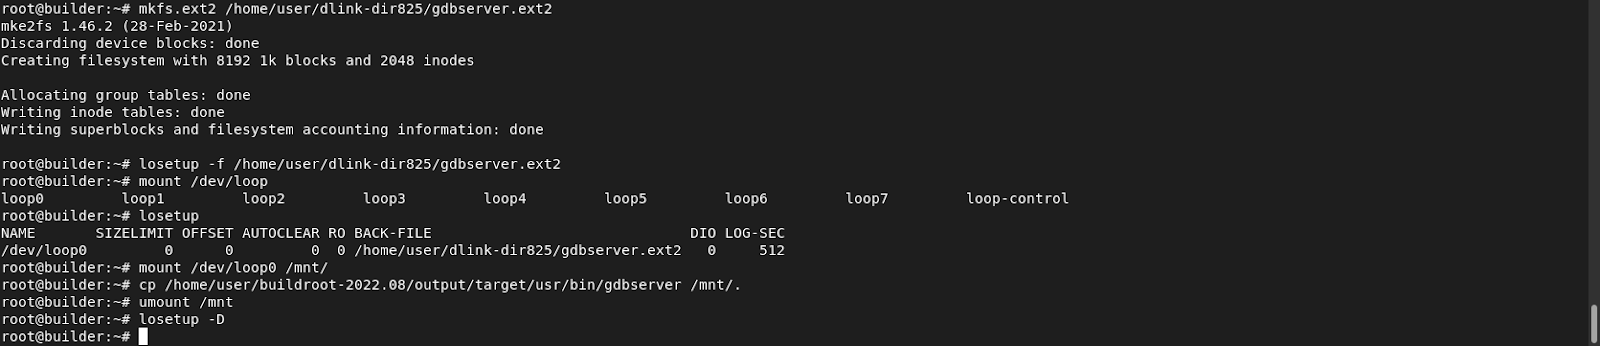
The following commands were used:
# mkfs.ext2 /home/user/dlink-dir825/gdbserver.ext2
# losetup -f /home/user/dlink-dir825/gdbserver.ext2
# mount /dev/loop0 /mnt/
# cp /home/user/buildroot-2022.08/output/target/usr/bin/gdbserver /mnt/.
# umount /mnt
# losetup -D
Since gdbserver is compiled statically you can use it in other MIPS32 little endian environments.
Run gdbserver in ext2 volume
To use the gdbserver ext2 image you must first mount it on the system:
~ # mount /dev/sdb /mnt
Then you can run gdbserver as usual:
~ # /mnt/usr/bin/gdbserver –help
The next article Series “Debugging with GDB & GHIDRA” will introduce a way to debug the firmware with GDB and GHIDRA and find vulnerabilities such as CVE-2022-47035 – a buffer Overflow vulnerability in D-Link DIR-825 v1.33.0.44ebdd4-embedded and below allows an attacker to execute arbitrary code via the GetConfig method to the /CPE endpoint. This CVE was identified during this IoT series. Stay tuned!
Are You Ready For The Next IoT Series Article?
IoT Series (I): Are People Ready to go? (online)
IoT Series (II): How to build kernel image from scratch
IoT Series (III): Firmware testing in QEMU
IoT Series (IV): Debugging with GDB & GHIDRA
Author
Hugo Trovão