IoT Series (II): How To Build Kernel Image From Scratch
This is the second blog post in the series of IoT-related articles. The first post IoT Series (I): Are People Ready to go? tells us how diverse and widespread are IoT technologies and the dangers associated with it. Normally forgotten with time and almost never updated, these devices are, nowadays, often connected to the Internet. Normally these are dealt with as black boxes (closed specifications and software) hard to debug, to reverse engineer and perform research on them.
This article explains the first steps of how to build an embedded Linux MIPS32 router image using buildroot; a toolkit that enables you to create customizable images from a set of Makefile files in an easy fashion.
This is the first step to easily do firmware reverse engineering research and have fun. It is for a MIPS32 image but the steps are almost the same for any other architecture supported by buildroot.
Resolving Dependencies
A clean Debian 11 distro on an amd64 virtual machine can be used to start. All dependencies needed to use buildroot MIPS embedded image are the packages build-essential, libncurses-dev and rsync.
The following screenshots show the build process error messages stating the missing dependencies. First is missing libncurses-dev, for menuconfig target.
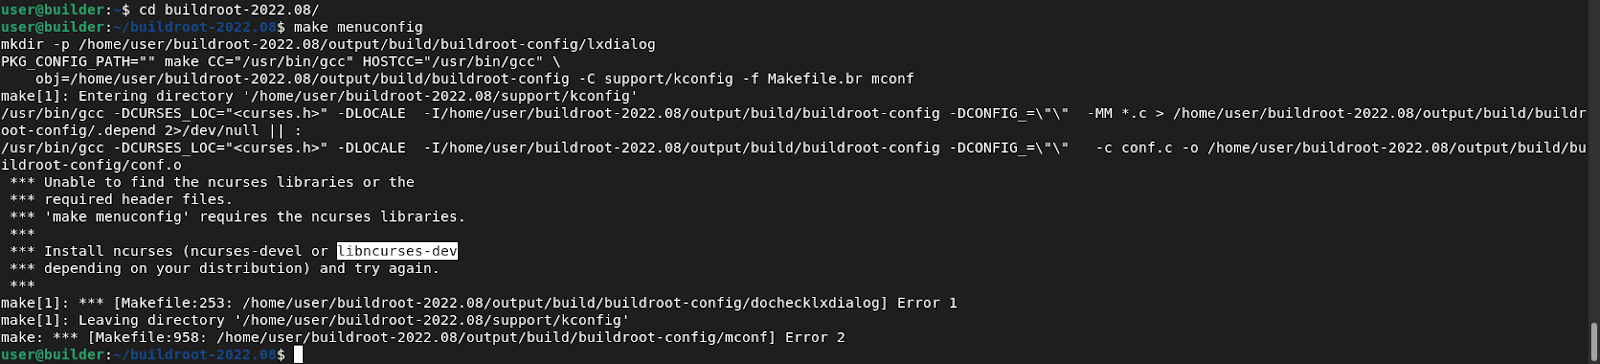
(click to enlarge)
Then, rsync is missing, for the general build target.

(click to enlarge)
After installing these two dependencies, you can readily start creating your embedded Linux image. In the Debian system, you can install them using the following command:
$ sudo apt install build-essential libncurses-dev rsync
Configuring The Build
Most part of the customization process is done on the build configuration. The build configuration is done through menuconfig build target of buildroot.
$ make menuconfig
We will be building an embedded Linux image for MIPS32 little-endian processor. The configuration done on the “Target options” can be seen in the next screenshot.
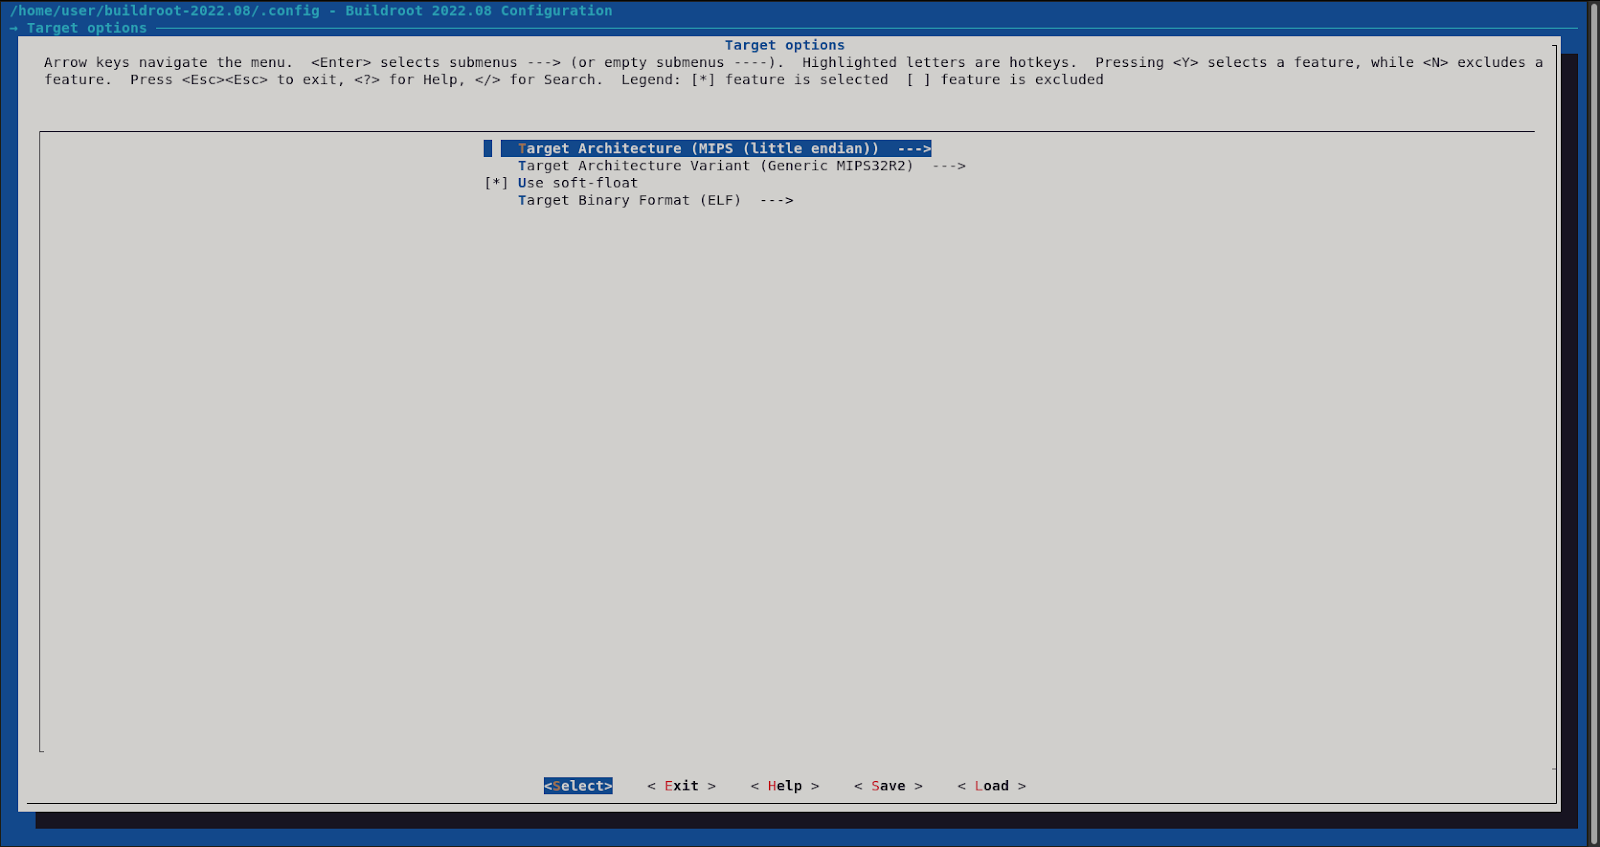
(click to enlarge)
On the “Toolchain” menu we set the following configuration to use a custom kernel version, in this case, 3.19 linux kernel. We also enabled “Enable WCHAR support” and “Thread library debugging” for building GDB, and we will have to enable “Enable C++ support”.
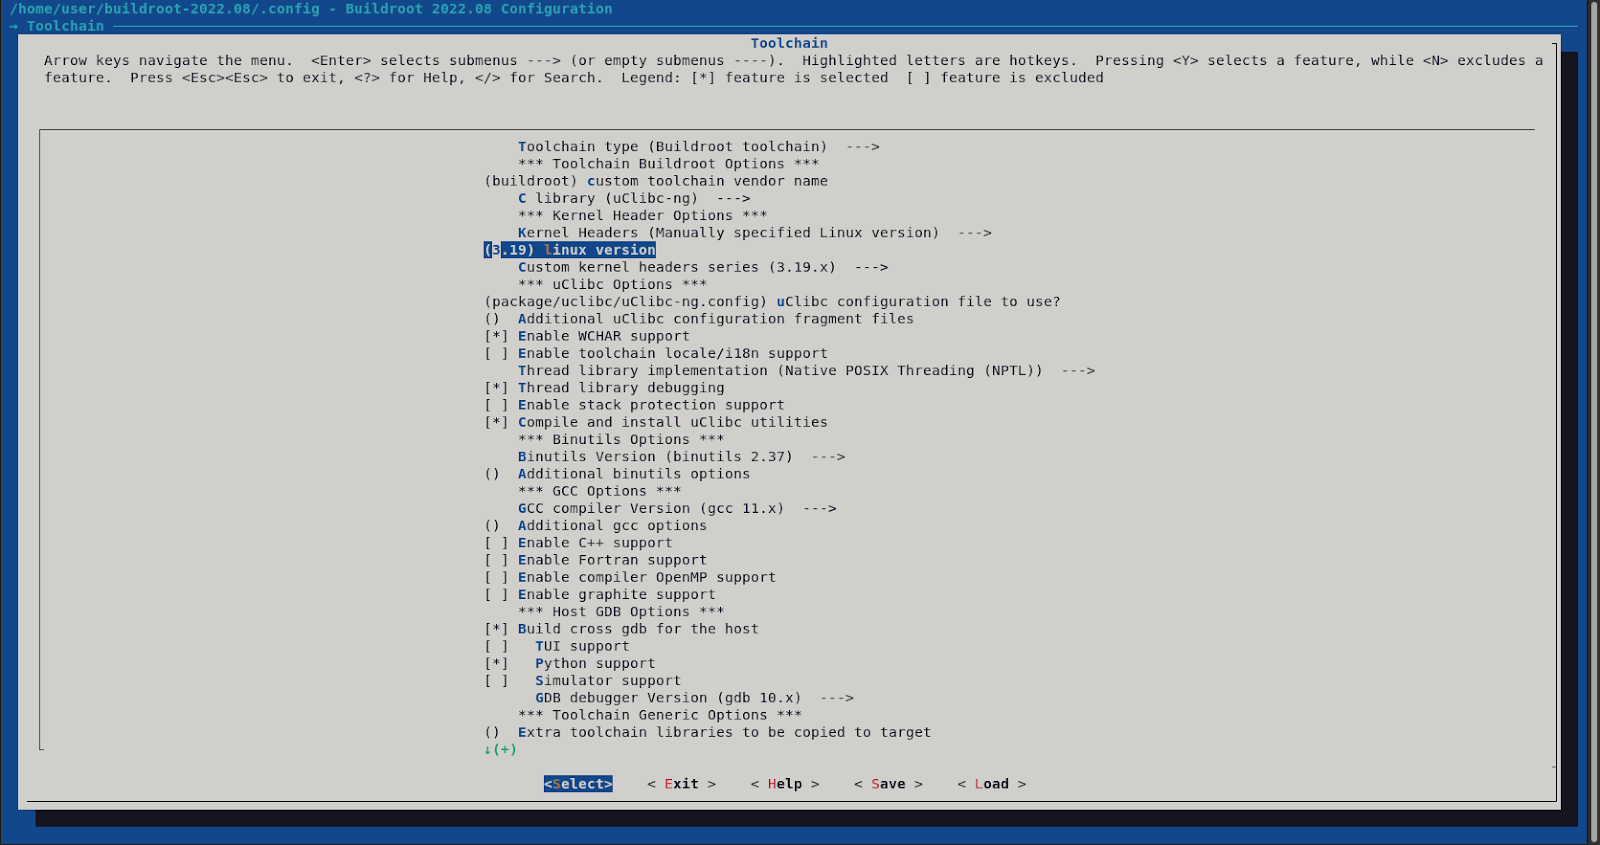
(click to enlarge)
We will build a Linux kernel image along the root filesystem. So we checked the “Linux kernel” option, configured the kernel version to 3.19, set the defconfig name to “malta” (for qemu target), and changed “Kernel binary format” to vmlinuz. We got the following screenshot after configuration.

(click to enlarge)
On “Filesystem images” we also enabled the “ext2/3/4 root file system” to create another filesystem root image in that format. In this case, we will have an ext2 volume image and a tar file with the root filesystem we are building.
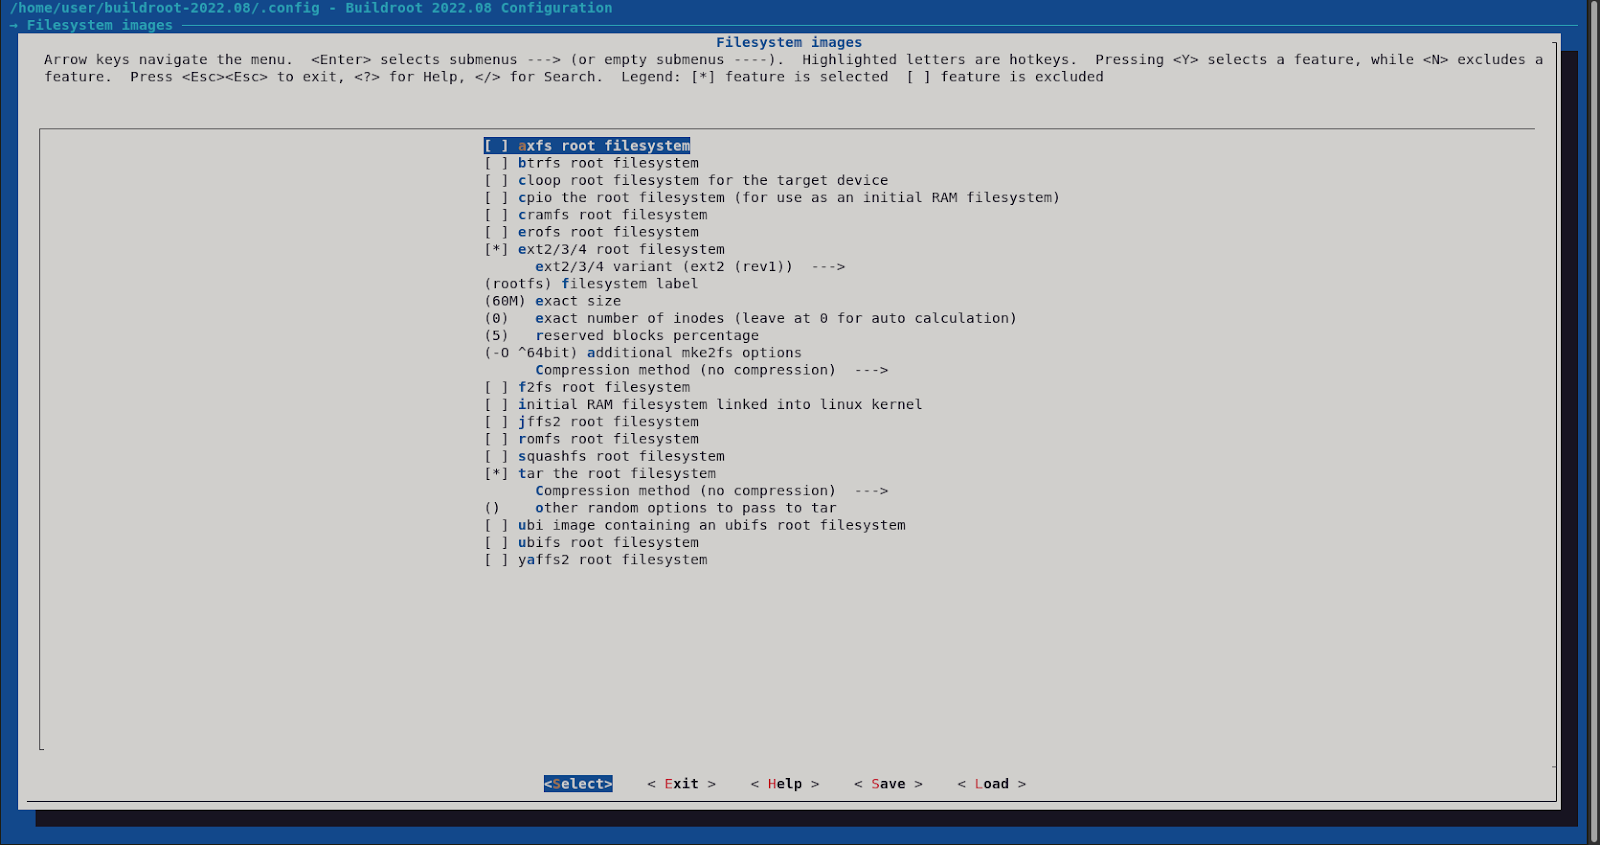
(click to enlarge)
There are other options to explore and customize the build that you can enable/disable and configure, but in our case, this is enough. The next step is to create the binary files through the proper build target.
The Build Process
We will now issue the proper build target that will use the configuration done earlier. For this we just need to run:
$ make
In our case, in the specified kernel build, we had some errors to solve.
The first one was the following error: this older version of the kernel was not compatible with the newer GCC compiler version. Still, we were able to compile by copying the last version GCC header of linux/compiler-gcc.h to the filename missing, in this case, linux/compiler-gcc5.h to linux/compiler-gcc11.h. This kernel was supposed to be compiled with GCC version 5 and we are using 11. The include is using a macro to expand the version of the current GCC in use.

(click to enlarge)
The following copy command was done to create the compiler-gcc11.h file.
$ cp output/build/linux-3.19/include/linux/compiler-gcc5.h output/build/linux-3.19/include/linux/compiler-gcc11.h
And again we issued the make command.
$ make
Another issue appeared on GCC incompatibility. It was solved in the linux kernel Makefile disabling errors on warnings about attributes. The following change was done to the linux Makefile:
…
CFLAGS_KERNEL = -Wno-error=attributes
…
A screenshot of the Makefile edit is shown down below.
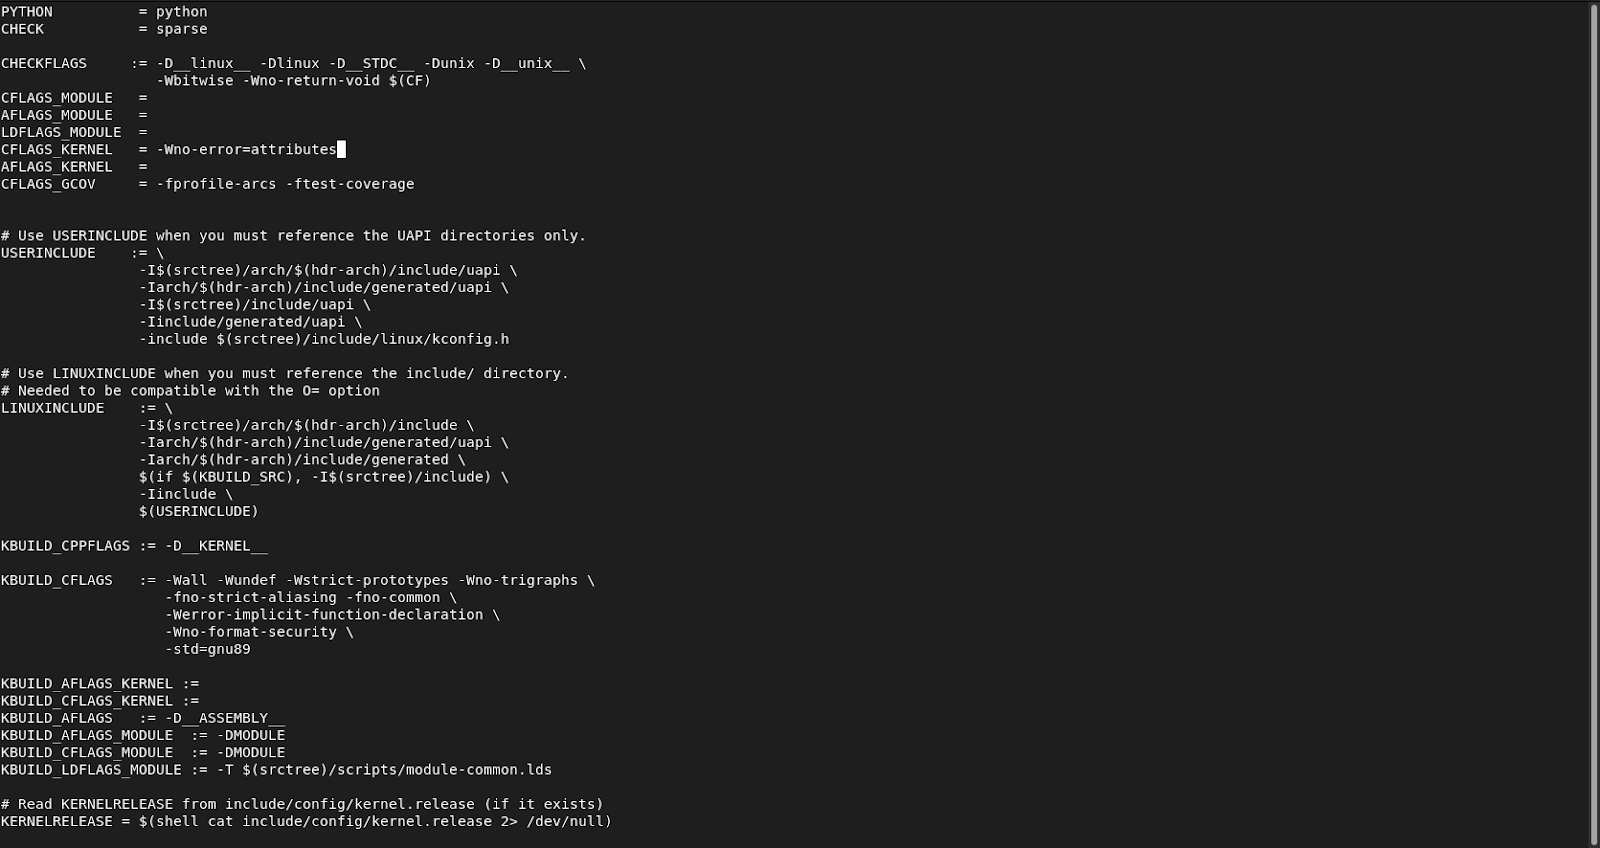
(click to enlarge)
After saving the Makefile changes, we did the default target again with:
$ make
This time there were no more errors and the filesystem and kernel images were finally successfully built. The final images will be at output/images/ directory inside buildroot root directory.
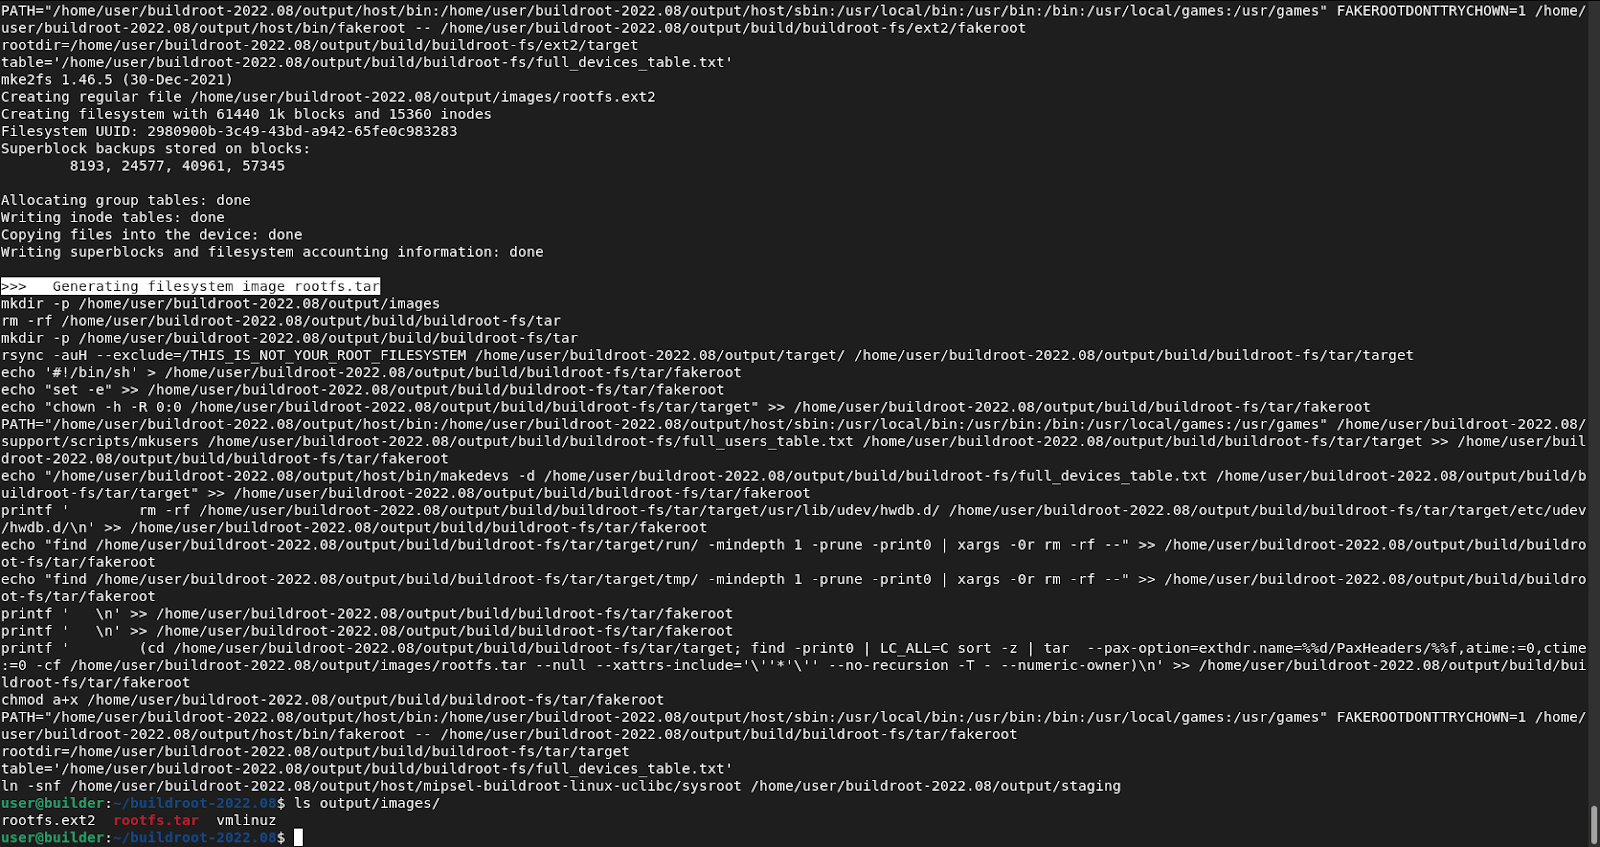
(click to enlarge)
Customizing a Little More
In this case, we were trying to use the kernel image with an “external” root filesystem extracted from a router firmware binary package. We needed to embed the IPv6 kernel object (driver) in the kernel since we will not be loading the kernel object (.ko) files from the root filesystem. For this simple change, we will have to customize the linux kernel configuration.
The linux-menuconfig target for make will enable the customization of the linux kernel configuration. The kernel menuconfig should appear as follows:
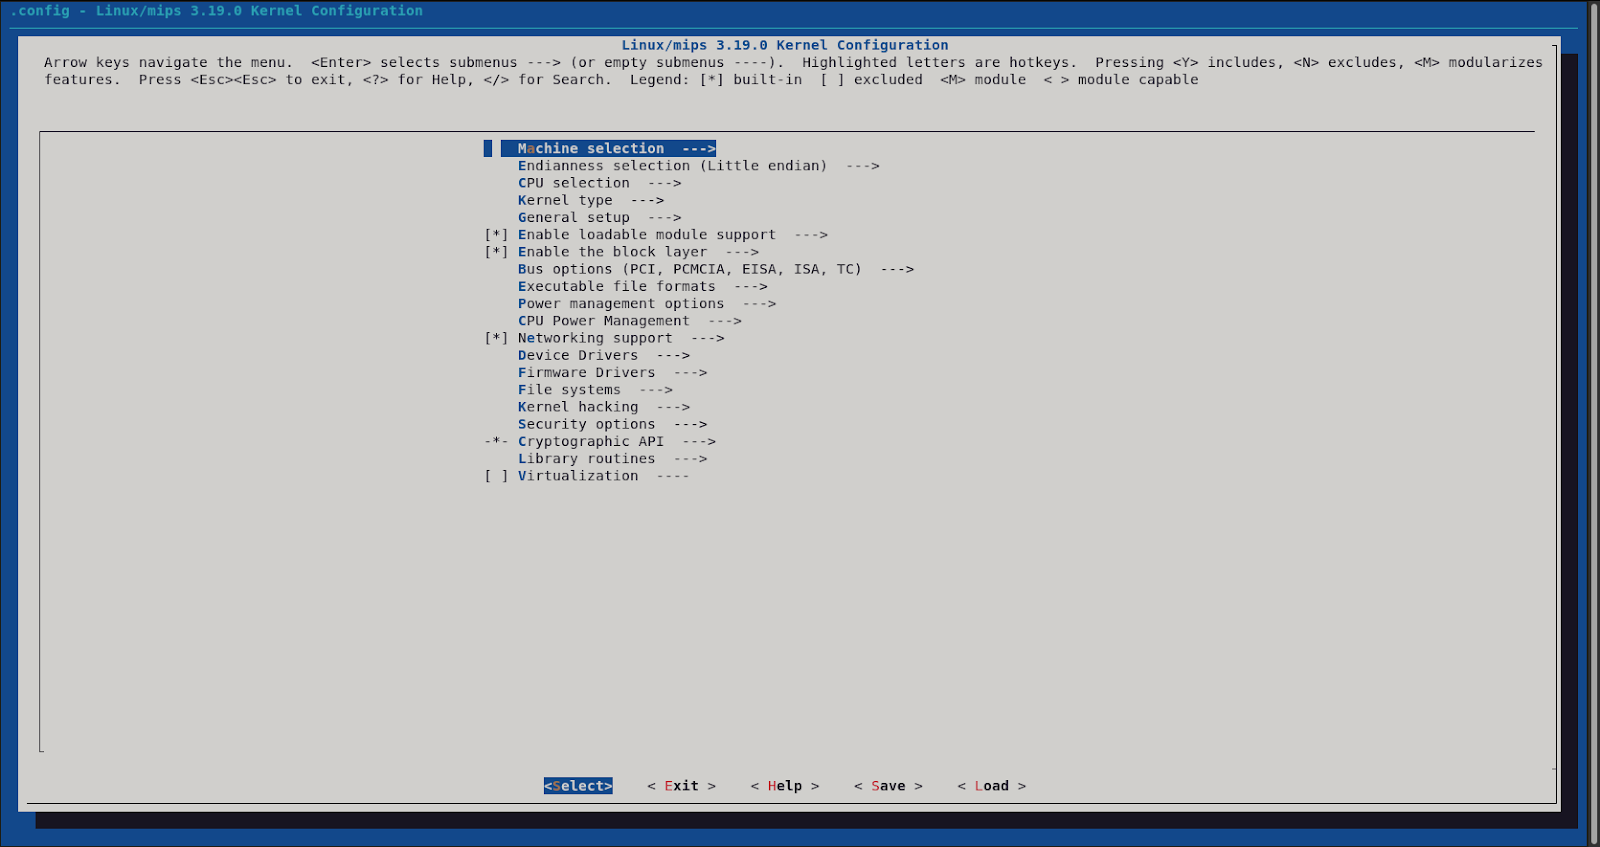
(click to enlarge)
On “Networking support”, then on the “Network options” menu item, select “The IPv6 protocol” with “Y” to make it built-in to the kernel, instead of “M” module.
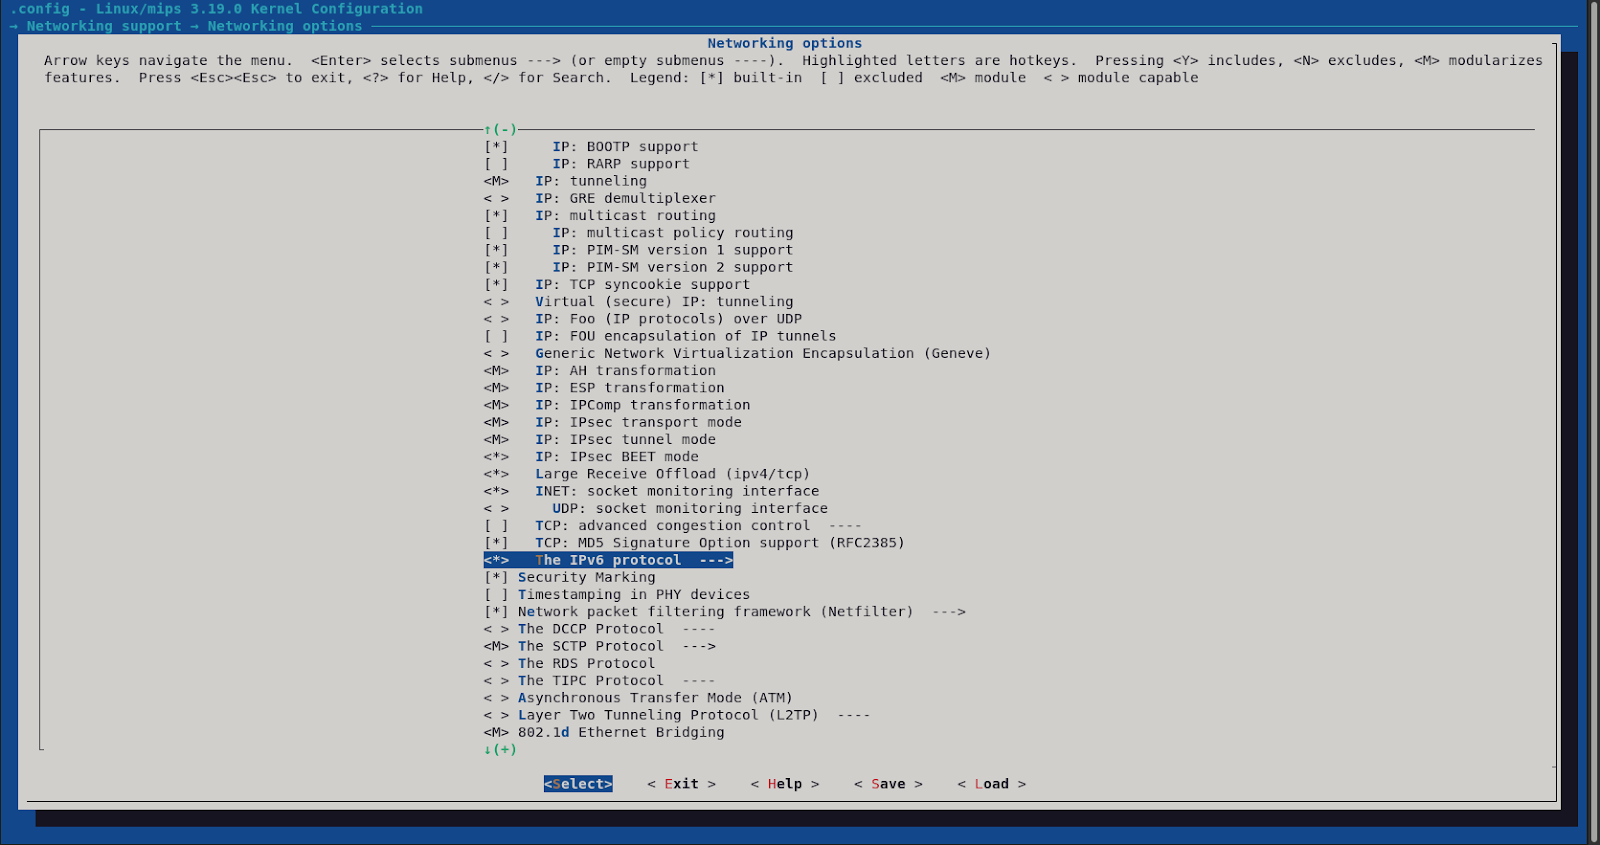
(click to enlarge)
Exiting the configuration, we can rebuild the kernel image by issuing the following command:
$ make linux-rebuild
The kernel image file should be at output/images/ directory updated.
An important thing to notice is although the target rebuild will actually build the component, it will not remake the root filesystem images. For that to happen you should issue make or make all after.
Buildroot components and targets
We ran linux-menuconfig target and configured the linux kernel component of buildroot because the set of Makefiles were run for “make menuconfig” for the component “linux”. There are other components that compose the buildroot environment, the main ones, if available, can be configured for instance with the following targets:
- busybox-menuconfig
- linux-menuconfig
- uclibc-menuconfig
- uboot-menuconfig
For the busybox component, the rebuild would be done through the busybox-rebuild target. Then regenerate the root filesystem images through make or make all.
Temporary source code modifications
During the build process, each component compiled will have its files in output/build/ directory which can be temporarily changed for build/rebuild. The clean targets will remove any modifications done.
Targets For Clean/Reconfigure/Rebuild The Build
To clean all build components the target clean solely will force the rebuilding of the target, while distclean will also remove configuration files.
Use them like this:
$ make clean
or
$ make distclean
You can selectively remove a build component, forcing the download, extraction, and configuration using the target dirclean of the component.
$ make linux-dirclean
Also, selectively on each component, you can rebuild the component using rebuild target and restart all over the process with reconfigure.
$ make linux-rebuild
or
$ make linux-reconfigure
Then regenerate the root filesystem images through make or make all.
The next article Series “Firmware testing in QEMU” will introduce a way to test and debug, using the same build process, but this time for a real device utilizing the original firmware. The next article will discuss the extraction of the root filesystem, using a similar but custom kernel and adding the gdbserver to its tools. Stay tuned!
Are You Ready For The Next IoT Series Article?
IoT Series (I): Are People Ready to go? (online)
IoT Series (II): How to build kernel image from scratch
IoT Series (III): Firmware testing in QEMU
IoT Series (IV): Debugging with GDB & GHIDRA
Author
Hugo Trovão